Sunday, November 30, 2014

DIY Roundup: Upcycle & Refashion

For those who celebrate, I hope you all had a wonderful Thanksgiving holiday!

If you're looking to breathe new life into older items, here are a few fun ideas to try out :)

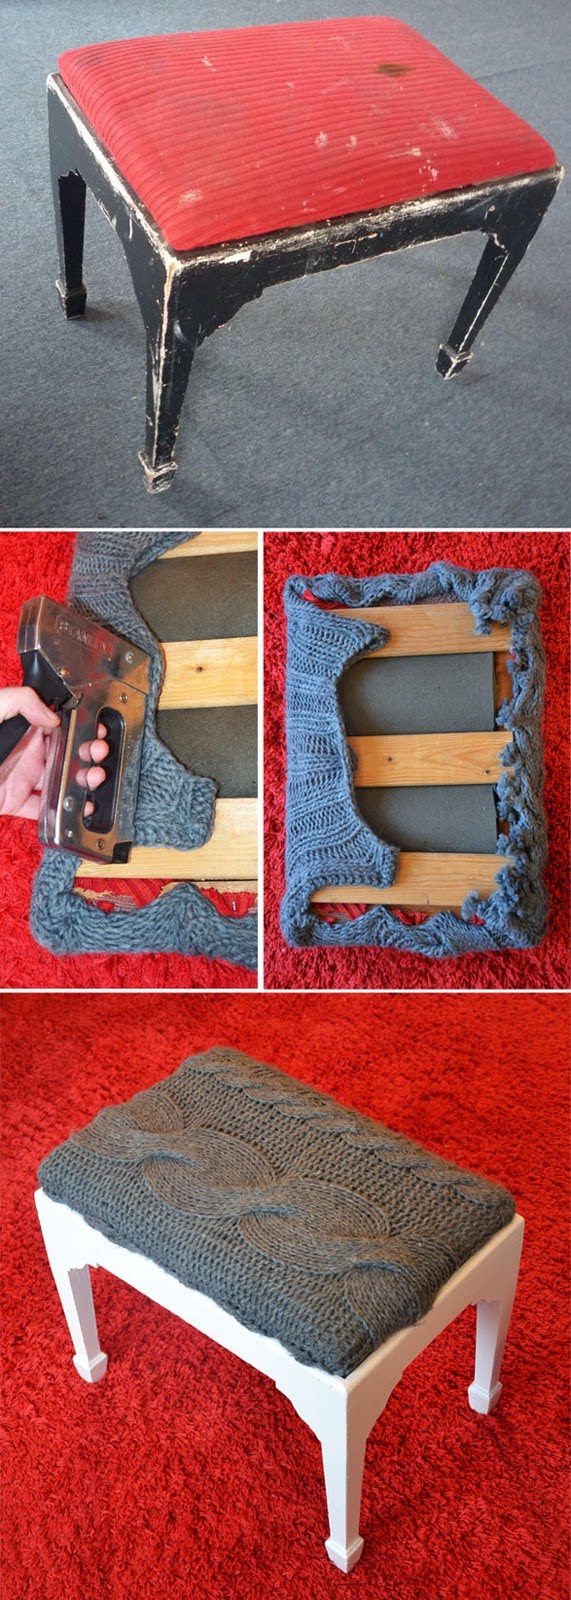
Repurpose a sweater for a cozy, luxe feel on your footstool (source and tutorial here)

Paint a border on your dress for an edgier look (source and tutorial here)

Add elbow and back patches to your sweater for a whole new look (source and tutorial here)

Happy DIY'ing!

Monday, November 17, 2014

DIY Roundup: Cold Weather Wear

It's been a week and I'm no closer to finishing my projects.  Rather than wait, I'd like to share some great-looking DIYs around the web:

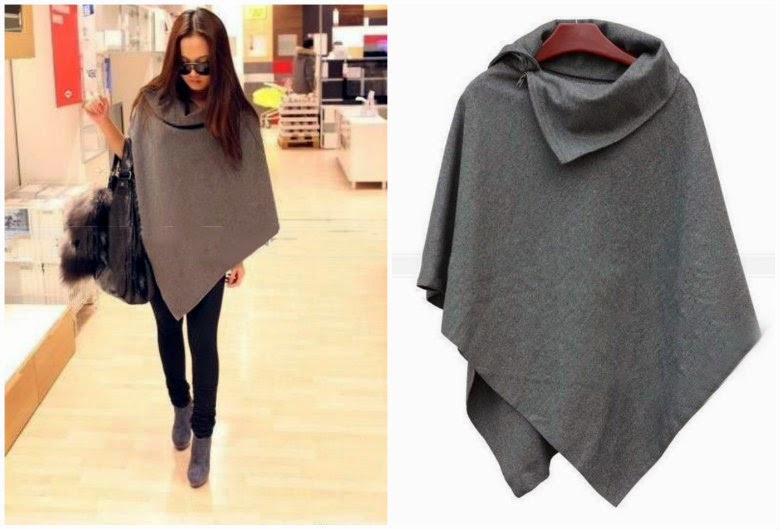
DIY Poncho (source & tutorial here)
I'm looking forward to giving this a shot!

Arm-knitting an Infinity Scarf in 15 Minutes (source & tutorial here)
I've never tried arm-knitting before, but it looks fun to try and the result is so pretty!

Cowl Scarf from Old Sweaters (source & tutorial here)
Always love a good upcycling tutorial

Keep warm and happy DIYing!

Thursday, November 13, 2014

Brocaded Box Pleats & Future Posts

The holiday season is here, and along with that, comes holiday sewing.  Right now, I'm working on a new winter coat, a brocade skirt, and a hooded cape.  I have a tendency to get to a certain point in the project and then need to stop and reflect, hence the partial projects.

Anyhoo, here's a look at the brocade box pleats project:
Thinking this might work well for a holiday party

I'd also let to get back in the groove of sharing some of my favorite Mom's Kitchen recipes like Chinese Fish Fillets, Black Sesame Dessert w/ Glutinous Rice Balls, Homemade Rice Noodle Rolls, etc.  If there are any Cantonese / Chinese recipes you'd like to see, let me know and I'll see if Mom has one to share :)

Have a lovely week!

Sunday, November 9, 2014

Gone (Fabric) Shopping

I've been slooooowwww with the sewing lately and am working on some holiday sewing projects that aren't yet ready for sharing.  Whilst I tweak those, I have a bit of a mishmash type of post on fabric shopping and food.

If you live in the Bay Area, Fabrix in SF got in some nice wools and sweatshirt type knits:
$15 / yd plaid wool - maybe another cape?  I saw this on Pinterest and am enamored

$2.89 / yd striped heavy knit - I'd like to try making something similar to Michelle's sweatshirt of Michelle Goes North (such a cool neckline!)

At Fabrics R Us in San Jose:
$3 / yd pretty checks - would love to recreate this look from Atlantic Pacific in spring

Online, Joann's has a 60% off regular priced fabric coupon (can also use in stores), 60% off Home Decor fabrics (great cottons for structured skirts), and 60% off fleece fabrics through Tuesday.

In other shopping news, Gap has an additional 40% off sale items in stores.  I picked up 2 more pairs of the Real Straight jeans for $15 each.  Since I had $10 in rewards, this netted out at $10 each:
Gap Real Straight, Mid-rise, online here, $15 in stores, got one destructed and one regular
(IG try-on pic here)
If you have a similar body shape (short and pear-shaped), you may like these!  I find the mid-rise helps mitigate tummy overhang and the skimmer length hits the top of my foot - great with flats or a thin cuff to show off the ankle with booties.  I used the "reserve in store" option online and it saved me from having to dig through the sale racks for my size.  I highly recommend this!

This weekend in eats, I got to meet up with Ping and Karen for ramen:
Iza Ramen w/ side of garlic oil

And followed that up with snacks and dessert at my all-time favorite haunt, Mango Medley:
Baked Scallops - amazing bold flavors

P.S. today's post title is a bit of a nod towards Gigi's Gone Shopping, one of my favorite reads :)

P.P.S. I'm trying out some food photography tips from Crazy Style Love - have you seen her IG feed? It's beautiful!

Hope everyone had a wonderful weekend!!

Sunday, November 2, 2014

15-Minute Turtleneck Cape DIY Tutorial

This tutorial is perfect for beginner sew-ists.  It consists of 2 simple shapes sewn together with 2 seams.

15-Minute Turtleneck Cape DIY Tutorial

Difficulty: Very Easy

Time: ~15 minutes

Materials:
  • 1.5 yards Fleece or heavy knit fabric
    • Bonus: Fleece does not fray so you may opt to leave the edges raw / unsewn
 Steps:

1.) First, fold a 40 x 40" square in 1/2 twice so that the resulting square you see is 20 x 20"

2.  From the folded corner, use your measuring tape to measure out 20" all along the edge of the fabric and mark (I use regular chalk, but there are also marking tools in the notions section of your fabric store) as you go to form an arc.  This arc will result in the circle you'll use for your cape.

You can see my blue chalk lines in the above photo from the arc markings.

3.  Cut along your arc lines.

4.  For a typical turtleneck, measure out your radius at the folded tip as 2.5" in the same manner as you did for the cape edges and then cut.

5.  Your turtleneck piece is a 14 x 17" rectangle.  Make sure your 17" edge is the stretchy side of the fabric so that you may easily slip your cape on and off.

If you're using the same type of fleece I am, you'll find that the selvedge edge does not stretch.  Use the selvedge edge for the 14" length.

6.  Fold in half with the right sides together and sew down (use a twin needle or serger for stretch) the open edges.  

7.  Turn your cape pieces inside out and place the turtleneck portion inside your cape.  Line up the edges and sew (twin needle or serger for stretch again - a regular straight stitch would snap).

If you're using fleece, you can leave your edges unsewn since it won't fray.

(You can choose to sew the edges if you'd prefer though!  Just fold inwards and stitch.)

You're finished!

Alternately, feel free to vary the measurements to your preferences.  Here are some ideas:

  • Cowl Neck - cut a larger neck opening and a correspondingly longer rectangle (on the stretchy side) for the cowl
  • Full-sized Long Cape - Cut your circle as 30" (should essentially by your neck to wrist length + 2.5") instead of 20"
  • Capelet - Make your circle 15" (should essentially be your neck to elbow length + 2.5") instead of 20"
Happy sewing!

LinkWithin

Related Posts Plugin for WordPress, Blogger...